
Table of Contents
Ever wondered how to take care of a microwave oven without making it feel like a chore? I’ve been there too—microwave splatters, burnt smells, and the dreaded “it’s not heating” moment. Over the years, I’ve learned that just a few easy habits can keep your microwave running smoothly for years. In this guide, I’ll share what’s worked for me—from quick daily wipes to how to clean a microwave grill the right way. If you’re looking for real tips that actually fit into a busy day, you’re in the right place. Let’s get started!
Why Microwave Care Matters (And What I Learned the Hard Way)
I’ll never forget the time I opened my microwave to heat a quick cuppa, only to find it smelled like last week’s curry and looked like a Jackson Pollock painting. I’d been putting off cleaning it for days—okay, maybe weeks—and I paid the price. The turntable had stopped spinning properly, and food was cooking unevenly. That’s when I realised I’d never actually thought about how to take care of a microwave oven, even though I used it every single day.
Neglecting microwave care can lead to bad smells, uneven heating, and even breakdowns.
It didn’t happen all at once. The door seal started wearing down. Grease built up in corners I didn’t notice. Eventually, it just gave up. Replacing it wasn’t cheap—and the mess was worse than I expected. Since then, I’ve made it a point to keep my microwave clean and well-maintained, and it’s been working like a charm.
Poor microwave maintenance can shorten its life and lead to costly repairs.
Now, I do a quick wipe after use, check the door, and give it a deep clean every week or so. The difference is huge. It heats more evenly, smells fresh, and even looks better sitting on the counter. Whether you use it once a day or ten, a little care goes a long way.
Taking care of your microwave helps it last longer, stay hygienic, and work more efficiently.
It’s like brushing your teeth—small actions every day that save you from bigger problems later. Plus, no one wants to reheat soup in a crusty, smelly box. Trust me, it’s not just about cleaning—it’s about making your microwave work for you, not against you.
How Do I Keep My Microwave in Good Condition?

1. Keep It Covered
This one’s a game-changer. The simplest way to stop splatters? Cover your food. I learned this after cleaning sauce off the roof of my microwave more times than I care to admit. Now, I always use a microwave-safe lid or even just a paper towel. It saves time and keeps everything fresher—trust me, a clean microwave is a happy microwave.
Always cover food with a microwave-safe lid to avoid mess and make cleaning easier.
It also helps your food heat more evenly, and it protects the interior from stubborn stains that are a nightmare to scrub later. You don’t need anything fancy—my go-to is a silicone cover I got online for a few quid.
2. Wipe Down After Every Use
You know that moment when you think, “I’ll clean it later”? Don’t. I used to do that too. But a quick wipe right after cooking—when the inside is still warm—makes cleaning a breeze. Food hasn’t had time to harden, and a damp cloth does the job in seconds.
Wipe your microwave after each use to prevent buildup and keep it smelling fresh.
Once a day, I do a steam clean with vinegar. I pop a bowl of water and white vinegar in the microwave, heat it for 30 seconds, and let the steam loosen anything stuck. It’s easy, natural, and my microwave smells brand new afterward.
3. Use Microwave-Safe Utensils Only
This might sound obvious, but it’s a rule that’s easy to forget. I once used a foil-lined plate to heat leftovers and ended up with sparks flying inside the microwave. Not my brightest moment! Since then, I’ve made sure every dish, mug, or cover I use is clearly marked “microwave-safe.”
Only use containers that are safe for the microwave to avoid damage and accidents.
Plastic can melt, some ceramics can crack, and metal is a definite no. Look for the symbol or label—it’s there for a reason. If in doubt, don’t risk it.
4. Regular Deep Cleans (With Simple Ingredients)
Every week or two, I give my microwave a proper deep clean. And no, I don’t use any harsh sprays or chemicals. Just lemon, baking soda, or vinegar does the trick. I cut a lemon in half, pop it in water, and heat it for a minute. Then I wipe down the inside—easy, natural, and it smells amazing.
Deep clean your microwave weekly with lemon or vinegar to remove grease and kill odours.
If it’s been a while, I make a paste with baking soda and water to tackle tougher spots. It’s gentle but effective. Whether I do this weekly or monthly depends on how much I’ve been using it—but sticking to it keeps things easy in the long run.
What Are 5 Rules for Using a Microwave Oven?
Microwaves are simple, but using them the wrong way can lead to messes, uneven food, or even damage. Over time, I’ve come up with five golden rules that I stick to every day. These are small things, but they make a huge difference in how well your microwave works—and how long it lasts.
Rule 1: Don’t Run It Empty
This is probably the most important (and the one I learned the hard way). I once hit “Start” without putting anything inside and wondered why it smelled off. Turns out, microwaves need something to absorb the energy. Running it empty can damage the magnetron—the part that heats your food.
Never switch on your microwave without food or liquid inside—it can cause serious damage.
Always double-check before you press any buttons. It’s one of those things that takes two seconds but saves your microwave in the long run.
Rule 2: Use Microwave-Safe Containers Only
Not everything belongs in a microwave, even if it looks safe. I once heated up leftovers in a takeaway box, and the plastic melted into the food. Since then, I always look for the microwave-safe label.
Only use containers marked microwave-safe to avoid melting, cracking, or chemical leaching.
Glass and ceramic are usually safe bets, but always check first. Avoid metal—no exceptions. Even a tiny bit of foil can cause sparks or a fire.
Rule 3: Cover Food, But Don’t Seal It Airtight
Covering food helps stop splatters and locks in moisture, which makes meals taste better. But if you seal it completely, pressure builds up, and things can explode (yes, I’ve cleaned that mess too).
Cover your food loosely to avoid mess, but let steam escape to stay safe.
Use lids with vents or just leave a small gap. It keeps things neat and reduces clean-up time—trust me, it’s worth the extra second.
Rule 4: Clean Spills Immediately
It’s easy to ignore a splash of sauce when you’re in a rush. But if you leave it, that tiny stain bakes in every time you use the microwave. Then it turns into a stuck-on nightmare.
Wipe up spills right after they happen to stop stains and smells from setting in.
A damp cloth is usually all you need. If something’s dried on, try heating a bowl of water inside first—it softens the mess and makes it easy to clean.
Rule 5: Let Food Sit After Heating
Microwaves heat from the outside in, which means the middle of your food might still be cold when the outside feels piping hot. Letting it sit for a minute helps the heat spread evenly.
Let food rest for a minute after microwaving to finish cooking evenly and avoid burns.
It’s called carryover cooking, and it works wonders—especially for things like soup, pasta, or frozen meals. Plus, it saves you from biting into a cold centre or burning your tongue.
Bonus: I once forgot Rule #1 and ran my microwave empty for over a minute while distracted. It started making a weird buzzing sound, and the inside smelled burnt. I had to get it checked, and the repair cost nearly as much as a new one. Lesson learned: follow the rules, even if you’re in a rush!
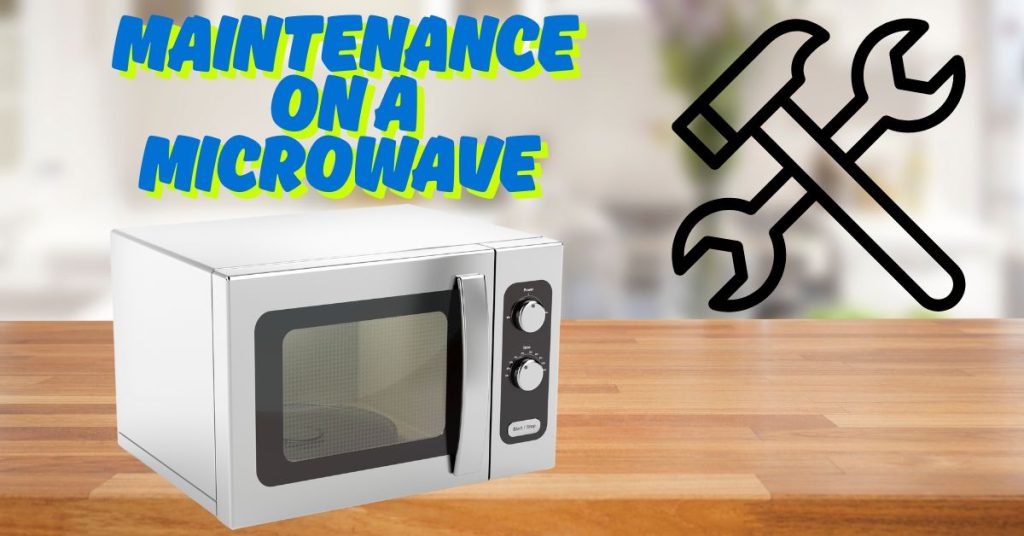
How to Do Maintenance on a Microwave
Microwaves may seem like low-maintenance appliances, but a little care now and then can save you from costly repairs later. I treat mine like a kitchen partner—it works hard, so it deserves a bit of love too. Here’s how I handle regular microwave maintenance, broken down into easy steps you can follow at home.
Clean the Turntable and Interior
I clean my microwave’s interior once a week and give the turntable a quick rinse every few days. It’s amazing how quickly small spills can turn into sticky messes. I use warm soapy water for the turntable and a soft sponge to wipe the inside walls. For tougher stains, I go with the good old lemon or vinegar steam method.
Clean the turntable and interior weekly to avoid grease buildup and lingering smells.
Pro tip: If something’s stuck on, I heat a bowl of water and lemon juice for 1–2 minutes. The steam softens the grime, and I just wipe it away with a cloth—no scrubbing needed.
Check the Door Seal
I once had a microwave that didn’t close properly, and I didn’t think much of it—until I realised food was taking forever to heat. That’s when I learned about door seals. They keep the heat in and protect you from radiation leaks (yes, that’s a thing).
A clean, tight door seal keeps your microwave safe and energy-efficient.
I check mine every month. I run a paper strip between the door and the frame—if it slides out easily while closed, the seal might be worn. A quick wipe with a damp cloth also keeps dust and grease from interfering with the seal’s grip.
Inspect the Power Cord and Plug
Here’s something most people overlook (and I used to as well). Every few months, I pull the microwave forward and check the cord. I look for frays, scorch marks, or any signs of wear. It takes less than a minute but gives me peace of mind.
Inspect the plug and cord regularly to prevent electrical hazards and appliance failure.
If I see anything odd—like a warm plug, flickering display, or exposed wires—I unplug it and call a professional. Electricity isn’t something I mess with. Better safe than sorry.
Regular maintenance doesn’t have to be complicated. Think of it like caring for your car—clean it, check it, and don’t ignore the warning signs. These small steps help your microwave run longer, safer, and more efficiently.
How to Clean a Microwave Grill – My Go-To Steps
Microwave grills are brilliant when you want that extra crisp on your toastie or leftover pizza—but they can get grimy fast. I used to ignore mine until I realised it was affecting the taste and smell of my food. If your microwave grill is covered in grease or burnt-on bits, don’t worry. Here’s exactly how I clean mine without stress or scrubbing for hours.
Step 1: Remove the Grill Tray and Soak It
First things first—take the grill tray out. If it’s removable, pop it into your sink and let it soak in hot, soapy water for at least 20–30 minutes. This helps loosen any built-up grease or burnt bits.
Soak your grill tray in warm soapy water to soften stubborn grime.
I usually do this while I clean the rest of the microwave. If your grill rack doesn’t come out, no worries—we’ll tackle that too.
Step 2: Scrub Gently with a Sponge or Brush
Once the tray has soaked, I give it a gentle scrub using a soft-bristled brush or a non-scratch sponge. Avoid steel wool—it can damage the coating. For stuck-on bits, I use an old toothbrush. Trust me, it works wonders.
Scrub with care—use soft tools to avoid scratching or damaging the surface.
A little patience goes a long way. It doesn’t need to be spotless, just clean enough to stop smoke or smells next time you use it.
Step 3: Deal with Grease and Burnt Food Inside
If grease or food has splattered up into the grill area, I use a steam-cleaning trick. I fill a microwave-safe bowl with water and a splash of vinegar, then heat it for about 3 minutes. The steam loosens any grime on the walls and around the grill.
Steam-clean with vinegar and water to loosen built-up grease without chemicals.
After letting it sit for a minute, I wipe down the inside with a cloth. For tougher spots, I make a paste of baking soda and water, spread it on the burnt areas, and let it sit for 10 minutes before wiping it off.
Step 4: Use a Baking Soda Paste for Tough Stains
Burnt bits that won’t budge? Don’t panic. I mix baking soda with a bit of water until it forms a thick paste. I apply it to the problem areas with a spatula or sponge and let it sit.
Baking soda paste is a natural and gentle way to cut through burnt food and grease.
After about 10–15 minutes, I wipe it away with a damp cloth. No harsh scrubbing needed—and it works every time.
Cleaning your microwave grill doesn’t have to be a chore. Once you’ve done it a couple of times, it becomes part of your regular cleaning routine. It keeps the microwave fresh, prevents burning smells, and makes your food taste better. A clean grill really does make a big difference!
How to Take Care of Microwave Oven After Cleaning
Cleaning your microwave is only half the job. What you do next helps keep it in great shape. These final steps take just a few minutes but make a big difference. Here’s what I always do after cleaning to protect my microwave and keep it smelling fresh.
Drying Matters
Once I’ve finished cleaning, I always leave the microwave door open for 15 minutes. It lets the inside air out and dry fully. Trapped moisture can cause rust, especially near the grill or under the turntable.
Leave the microwave door open after cleaning to stop moisture and prevent rust.
I used to shut the door straight away. One day, I noticed small rust spots along the edge. Since then, I’ve made it a habit to let it breathe. It’s a simple fix that works.
Deodorising Tips
Even after cleaning, smells can linger—especially after fish, garlic, or curry. To fix this, I leave a bowl of baking soda or coffee grounds inside overnight. Both work well to absorb bad smells.
Use baking soda or coffee grounds to keep your microwave smelling fresh between uses.
Some days, I use lemon peels. They give off a clean scent and look nice too. I switch them out every few days, and it keeps the inside feeling fresh.
Reassembly and Storage Tips
When everything is dry, I place the turntable back on the ring. I double-check that it’s lined up right so it spins the way it should. A small mistake here can mess with how your food heats.
Place the turntable back correctly to avoid wobbling and uneven cooking.
I store my grill rack in a drawer when I’m not using it. This keeps it clean and gives the microwave more room. It’s easy to grab when I need to grill something.
Taking care of your microwave after cleaning doesn’t take much time. But it keeps things running well and helps the appliance last longer. Just like brushing your teeth after a dentist visit—daily habits matter most.
Extra Tips That Keep My Microwave in Great Shape
Over the years, I’ve picked up a few extra habits that help my microwave last longer and work better. These aren’t just “nice-to-do” things—they’ve saved me time, money, and more than a few headaches. Here are three tips I swear by to keep my microwave in tip-top shape.
Use a Surge Protector
This one might not cross your mind, but it’s a smart move. I learned the hard way when a power surge knocked out my last microwave during a thunderstorm. Since then, I’ve always plugged mine into a surge protector.
Plug your microwave into a surge protector to guard it against power spikes and costly damage.
It’s a small investment that protects your appliance—and your wallet. If your microwave suddenly shuts off or won’t start, a power surge might be to blame.
Never Slam the Door
It’s tempting to close the microwave door with a quick shove—especially when you’re in a rush. But slamming it can damage the door latch or misalign the sensors. I used to do this all the time, until one day the door wouldn’t shut properly.
Close the microwave door gently to avoid damaging the latch or door seal.
Now, I make a point to press it shut with care. It takes an extra second, but it saves the stress of dealing with a broken door down the line.
Watch Cooking Times
Microwaves are fast, but they’re also powerful. I once overheated a mug of milk so badly that it boiled over and scorched the inside. That smell stuck around for days! Now, I always check cooking times and start low, especially when trying a new recipe or reheating leftovers.
Start with shorter cooking times to avoid overheating food or damaging your microwave.
If your food needs more heat, you can always add a few more seconds. It’s much easier to build up heat than to clean up a burnt mess.
These small habits don’t take much effort, but they really do keep your microwave running smoothly. Think of it like looking after a trusted kettle or your favourite frying pan—a bit of care now means it’ll keep working hard for you for years to come.
Final Thoughts – A Little Care Goes a Long Way
Taking care of a microwave oven doesn’t have to feel like a big job. In fact, it’s the small, everyday habits that make all the difference. I’ve learned this through trial and error—and more than a few curry splatters.
Whether it’s wiping down the inside after dinner, checking the door seal once a month, or just letting the grill air dry, every bit helps. These steps don’t take much time, but they’ve helped my microwave last longer, smell fresher, and work better.
If you’ve ever wondered where to start, just pick one small habit today. Then build on it. Before you know it, you’ll be the one giving tips on how to take care of a microwave oven like a pro.
Your microwave works hard for you—give it a little care, and it’ll return the favour for years to come.
Unlock more tips..Are Handmade Ceramics Microwave Safe?
FAQs :
How often should I clean my microwave?
I recommend giving it a quick wipe every day—just a damp cloth after each use keeps things from building up. Then, aim for a deep clean once a week, or at least every two weeks.
Can I use bleach in my microwave?
Personally, I stay away from bleach. It’s too harsh and the smell lingers. Instead, I use natural options like lemon, vinegar, or baking soda—they clean just as well and are safer, especially around food.
How long should a microwave last with good care?
With basic maintenance, mine has lasted over 8 years—and it’s still going strong. Regular cleaning, checking the cord, and gentle use can really extend its life.
What’s the easiest way to clean a microwave grill rack?
I soak it in hot, soapy water for about 30 minutes. Then I scrub it gently with a soft brush and rinse well. For tougher stains, a baking soda paste does the trick.